Website need to render fast these days. No one likes to wait for a website to load. Users get frustrated and navigate away if a website is slow. As a result, it is very important to configure your website to load fast for users.
There are many plugins available that add headers sent back to the browser requesting them to cache static assets. In this post, I am going to show how you can add expires headers without using any plugins. In addition to adding headers, you should also enable other cache techniques to reduce the load on your database. I have used Redis on my server and explained how to enable that in this post.
Background
A typical website consists of HTML, CSS and javascript files at the very least. In the case of most sites, the CSS and javascript are fairly static i.e. these files do not change often, only the HTML changes from page to page.
One of the tricks to make websites load faster is to make a browser cache frequently used assets. If your user visits multiple pages on your website, there is no need for their browser to fetch the CSS and javascript after the
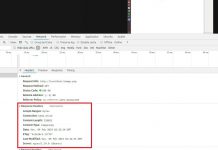
Adding Expires Headers tells a browser to decide if the file needs to be fetched from the server or if it can be reloaded from disk or memory cache. These headers don’t make any impact on the first visit of the user. However, this technique cuts down the number of HTTP requests a user’s browser must make to render a subsequent page. This also applies for returning users and decreases load time for website pages. The longer you can afford to cache assets the better it will be for returning users.
There is one thing to keep in mind though, if you ask browsers to cache assets for a very long time, then users may not see the changes you make in your CSS and javascript right away. There are ways you can employ to cache bust these CSS and javascript resource, but you do have to decide how long you are willing to wait in some cases for users to see new functionality.
Procedure
This site is running Bitnami packaged Apache, so my procedure is tailored for this specific install. However, the instructions will be similar for other server configurations. You may just have to run different commands or edit different files.
I am assuming that you have full root access to your server as you will need to edit some configuration files. If you do not have access to ssh into your server it might be easier for you to just use a plugin that does this for you.
First, we have to verify if the Expires module is loaded in your server configuration. You can do this by running the following command
sudo /opt/bitnami/apache2/bin/apachectl -M | grep expires
expires_module (shared)
On the Bitnami installation you can edit this in the httpd.conf file
sudo vi /opt/bitnami/apache2/conf/httpd.confLook for the line
LoadModule expires_module modules/mod_expires.soand uncomment it. Restart the apache server.
sudo /opt/bitnami/ctlscript.sh restart apacheIf on other servers you do not see this response you can try and enable the module yourself. On an Ubuntu server you could run this command
sudo a2enmod expiresNext step is to add the configuration to add Expires Headers. Start by editing the file /opt/
<Directory "/opt/bitnami/apps/wordpress/htdocs">
    # After Other configuration
    <IfModule mod_expires.c>
       # Turn on the module.
       ExpiresActive on
       # Set the default expiry times.
       ExpiresDefault "access plus 10 minutes"
       ExpiresByType image/jpg "access plus 7 days"
       ExpiresByType image/gif "access plus 7 days"
       ExpiresByType image/jpeg "access plus 7 days"
       ExpiresByType image/png "access plus 7 days"
       ExpiresByType text/css "access plus 7 days"
       ExpiresByType text/javascript "access plus 7 days"
       ExpiresByType application/javascript "access plus 7 days"
       ExpiresByType image/ico "access plus 7 days"
       ExpiresByType image/x-icon "access plus 7 days"
       ExpiresByType image/vnd.microsoft.icon "access plus 7 days"
    </IfModule>
    # But before end of the Directory block
</Directory>
Restart Apache web server on your host.
sudo /opt/bitnami/ctlscript.sh restart apache
or
apachectl restart
The first line “ExpiresActive on” turns on the module. I have an ExpiresDefault for file types that are not covered by the subsequent configuration which sets the expires headers to 7 days for other file types.
It is a good idea to set the headers by file type as it gives you better control over how long each file type will be cached. Images rarely change, therefore you could set the cache period even longer, say 6 months or one year if you wish.
Photo Credit
Photo by NeONBRAND on Unsplash


